Change Image DPI
Change image DPISet the print resolution a JPEG or PNG reports — 300 DPI for a print shop, 72 for a screen — without re-encoding a single pixel, here on your device.
Resolution settings
The number the file will report to a printer or a print shop.
Common print resolutions
These are the numbers people are usually asked for, not rules any printer or upload form enforces.
JPEG, PNG · up to 20 MB
- Processed on your device
- No image upload
- No account
- No watermark
DPI is a note in a file’s header about how large the picture is meant to print; it is not a property of the pixels, so changing it adds no detail and takes none away. A 1600 × 1200 photo is still 1600 × 1200 whether the file claims 72 DPI or 300 — at 72 that is 22.22 inches across, at 300 it is 5.33 inches across. Resizo reads the note a JPEG or PNG is already carrying, shows both print sizes side by side, and writes the number you choose into every resolution field the file has, so every program reads the same one. The compressed picture data is copied byte for byte — nothing is decoded and nothing is re-encoded. The reader and the writer are code this page hands to your browser, so the file is opened and rewritten on your own device.
What this tool changes
- Pixels
- Copied byte for byte — nothing is decoded
- EXIF
- Resolution fields rewritten, everything else kept
- GPS
- Kept
- XMP
- Kept
- ICC profile
- Kept, so the colours do not shift
- DPI record
- Set to the number you choose
- Transparency
- Kept
Only the number the file claims about print size changes. Nothing is decoded, so the picture is the same picture — this tool removes no metadata, and /remove-image-metadata is the one that does.
How to change the DPI of an image
The panel reads before it writes. A file dropped here is inspected first, so the number it already carries and the header that number lives in are on screen before you decide what to replace them with.
Need enough pixels for the size you print at, not just a new label? Resize it for print in centimetres, millimetres or inches — that changes the pixels, which this page never does.
- Choose the JPEG or PNG on your device. Drop the file onto the panel, or press Browse images. JPEG and PNG, up to 20 MB. It is read where it already sits, and only the header is read — the picture itself is never decoded.
- Read What this file says. The readout appears as soon as the file lands: Recorded resolution and which header it came from, Pixel size, and Prints at the recorded DPI. If nothing was ever recorded it says None recorded, which is the usual answer.
- Type the number into New DPI. New DPI starts at 300. Type the figure you were asked for, or press one of the Common print resolutions chips — Screens 72, Home printing 150, Print 300, Fine print 600.
- Check the print size before you commit. The last row of the readout recalculates as you type, so Will print at 300 DPI shows the size on paper the new number implies while the old row still shows the size the file claims now.
- Press Set DPI. The button reads Writing… while the header is rewritten. Every other byte of the file is copied straight across, so the pixel dimensions cannot move.
- Read the line under the result, then Download image. It names the value the file carried before, the value it carries now, which resolution fields were written, and the print size that implies. Press Download image to save it.
What DPI is inside a JPEG or a PNG
DPI stands for dots per inch, and inside an image file it is a note in the header saying how large the picture is meant to be when it is printed. It is not a property of the pixels. Nothing about the picture data records it, nothing about the picture data changes when you edit it, and two files with identical pixels can carry different numbers.
That is why the readout on this page prints the arithmetic rather than the number on its own. Pixels divided by DPI gives inches, so the value only means something once you know how many pixels there are — and the same value means a different size on paper for every different picture.
A file often carries no value at all. Screenshots, exports from web tools and plenty of camera output leave the field unset, and software that finds nothing there falls back to 72 and displays that, which is where most of the “my image is only 72 DPI” alarm comes from. The readout says None recorded when that is the case, rather than repeating the guess back to you.
Pixels stay put; the print size is what moves
Take a 1600 × 1200 photograph. It is 1600 × 1200 in every row below — the file is the same file, and the only thing changing is the label it carries about paper:
| Recorded DPI | Pixels | Prints at | Where you see it |
|---|---|---|---|
| 72 | 1600 × 1200 | 22.22 × 16.67 in | What a file with no resolution recorded is usually assumed to be |
| 150 | 1600 × 1200 | 10.67 × 8.00 in | A common setting for a home printer |
| 300 | 1600 × 1200 | 5.33 × 4.00 in | The figure print shops ask for most often |
| 600 | 1600 × 1200 | 2.67 × 2.00 in | Fine printing, and small on the page as a result |
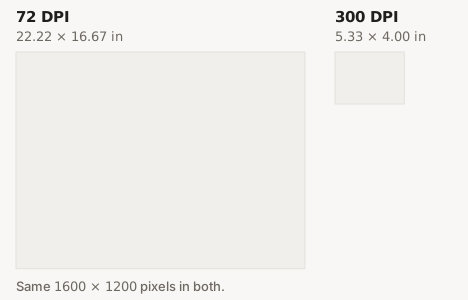
Nothing in that table is a change in quality. The 300 DPI row is not sharper than the 72 DPI row; it is the same photograph asked to occupy a quarter of the width, which is what makes it look better on paper. Print it at 22 inches across and the detail is spread thin whatever the header says.
So this page cannot make a small picture into a large print. If a printer needs more pixels than the file has, no number written into a header will produce them. Need more pixels, not a different label? Resize it for print — that changes the picture itself, and enlarging a small one softens it, which is the honest trade.
Asked for “300 DPI” and not sure which job is meant? The two jobs, each measured.
Which fields get written, and why both of them
A JPEG can record its resolution twice: in the JFIF header sitting right at the front of the file, and again in the EXIF block as XResolution and YResolution. A PNG can do the same, in its pHYs chunk and in an eXIf chunk. Different software reads a different one first, and a file whose two records disagree reports one number to your design application and another to the shop’s.
That is the failure this page exists to fix, so it writes every resolution field the file actually has — JFIF and EXIF for a JPEG, pHYs and eXIf for a PNG — and the line under the result names the ones it wrote. The header the format calls its own is created when it is missing, since a file with no resolution record at all is the commonest case; an EXIF block is only ever rewritten in place, never invented, because adding one would move every other field in it.
Everything else is copied straight across. The compressed picture data, every other segment or chunk, and anything a phone stapled onto the end all arrive byte for byte as they were, which is why the pixel dimensions cannot change and why a JPEG does not lose a generation of quality to a header edit. The file grows by a few bytes only when a record had to be added where there was none.
The resolution fields are the only ones touched, so the camera model, the date and any GPS coordinates stay exactly where they were. Want to see what is stored first? View image metadata — it reads the file and writes nothing back. Want the camera data gone as well? Remove the metadata — that is a separate job on a separate page, and it leaves the pixels alone in the same way.
What this page can and cannot do, and where it runs
JPEG and PNG, up to 20 MB per file, one file at a time. WebP is not here because the format has no resolution field of its own — a DPI could only travel in its EXIF or XMP metadata, which this page does not read or write. HEIC is not supported either; convert an iPhone photo to JPEG first and it arrives with a resolution field of its own.
Values from 1 to 10000 are accepted, but very low ones are not worth setting. Some software — libvips, which a great deal of server-side image handling is built on — treats an implausibly low resolution as no resolution at all and reports its own default of 72 instead, so a file written at 1 DPI can come back reading 72. Every figure a print shop, a portal or a publisher actually asks for — 72, 96, 150, 200, 300, 600 — sits far above the range where that happens.
Changing the DPI does not make the file smaller, because no compression decision is revisited; at most it grows by the few bytes of a header that had to be added. If the file is too heavy for wherever it is going, that is a different job: too large to send? Compress the image, then set the resolution afterwards so the number survives.
All of it happens on your own device. The header is read the moment the file lands, the new one is written when you press Set DPI, and both run on your own machine, so the photo is never transmitted and no copy of it exists anywhere else. This page also asks very little of your hardware compared with the rest of the site — nothing is unpacked into raw pixels, because nothing here needs the picture at all.
Frequently asked questions
Does changing the DPI change the pixels in my image?
No. The width and height in pixels are exactly what they were, and so is every pixel in between: this page rewrites a number in the file’s header and copies the compressed picture data across untouched. Nothing is decoded, nothing is re-encoded, and no detail is added or lost. The file usually comes back the same number of bytes, or a handful larger when a resolution record had to be added because it had none.
Why does my image say 72 DPI?
Because nothing ever wrote a different number into it. A camera, a screenshot or an export from a web tool often leaves the resolution field unset, and software that finds no value falls back to 72 and shows you that. It says nothing about the quality of the picture — a 6000 × 4000 photo marked 72 DPI has exactly as much detail as the same file marked 300, and the readout on this page tells you which of the two it is and which header the value came from.
Which DPI do I need?
The one whoever is printing or receiving the file asks for, and nothing else. 300 is the figure print shops name most often, 150 suits a home printer, and 72 or 96 is what screen work is usually labelled. The four chips on this page are labelled Screens, Home printing, Print and Fine print because they are the values people are commonly asked for — none of them is a requirement any printer or upload form enforces, so read the instruction in front of you and type that number into New DPI.
Is my image uploaded anywhere?
No. The reader that inspects the header and the writer that rewrites it are loaded into the page and run on your own device, so the file is opened and saved by your own machine and never reaches us. That also means there is nothing on this page that could send a photo somewhere — it is opened where it already sits, and the new file is written beside it.
Why can I not do this to a WebP or a HEIC file?
WebP has no resolution field of its own — a DPI could only travel in its EXIF or XMP metadata, which this page does not read or write. HEIC is not supported here either. Convert an iPhone photo to JPEG first and the resolution field arrives with it.
Will Photoshop and other software read the new value?
That is the reason both fields are written. A JPEG can keep its resolution in the JFIF header and again in the EXIF block, and a PNG in the pHYs chunk and again in an eXIf chunk — and different programs read different ones first. Writing one and leaving the other stale is what makes a file report 300 in one application and 144 in the next, so this page rewrites every field the file actually has and the line under the result names the ones it wrote.
What to do next
- The print shop wants more pixels, not a different label — resize it Resize Image
- Same picture, smaller file? Compress it Compress Image
- A format this page cannot write the DPI into? Convert it first Convert Format
- Need printed copies? Lay out as many as fit on 4 × 6 in, 5 × 7 in, Letter (8.5 × 11 in) or A4 (210 × 297 mm) paper at exact size Passport Photo Print Sheet
- Changing the print size but not sure what else the file carries? Read its metadata Image Metadata Viewer
- Sharing the file afterwards? Strip the metadata that names where it was taken Remove Image Metadata
- Printing a set of photos? Put them in a PDF at the page size you want JPG to PDF
- Compress many JPG, PNG and WebP files to a maximum size each, then download them one by one or as a ZIP. Bulk Image Compressor
- Convert many JPEG, PNG, WebP and AVIF files to one format at once, then download them one by one or as a ZIP. Bulk Image Converter
- Remove unwanted areas with exact pixel control. Crop Image
- Make favicon.ico, the PNG icons and an Apple touch icon from one logo in your browser — nothing is uploaded. Favicon & App Icon Generator
- Convert iPhone HEIC photos to universal JPEG. Convert HEIC
- Crop, size and compress a scanned signature for an online form. Signature Resizer
- Crop and size a passport or ID photo to exact pixels, file size, format and DPI. Passport & ID Photo
- Fit an image to exact pixels and a maximum file size in one step — crop or pad, encode, write DPI and check the file before download. Image Size Fitter
- Combine several PDFs into one file, in the order you choose. Merge PDF
You are on the Change Image DPI tool.