Signature Resizer for Online Forms
Signature resizerCrop a scanned signature, fit it into the pixel box a form asks for and keep it under the file size limit the form sets — done on your device, never uploaded.
Signature settings
Leave one side empty and it is worked out from the area you keep.
Examples of sizes forms ask for
Examples only. Use the exact size the form you are filling in asks for.
JPEG, PNG, WebP · up to 20 MB
Output
Leave empty for no limit. When set, quality is reduced first and the picture is shrunk only if it still does not fit — the result says so.
- Processed on your device
- No image upload
- No account
- No watermark
A form that wants a signature usually wants three things at once: the ink and none of the paper around it, a width and height in pixels, and a file no larger than some number of kilobytes. Doing those one tool at a time means the last step keeps undoing the one before it, so Resizo puts all three in a single pass: drop the scan in, narrow the kept area down to the signature, type the size the form states, and name a maximum file size if the form names one. Quality comes down first and the picture is made smaller only when that was not enough, and the line under the result says which of the two happened. The cropper, the resampler and the encoder are code this page hands to your browser, so the scan is read and rewritten on your own machine.
What this tool changes
- Pixels
- Decoded and written again
- EXIF
- Removed
- GPS
- Removed
- XMP
- Removed
- ICC profile
- Removed
- DPI record
- Removed — the new file claims no print size
- Transparency
- Depends on the format you save — PNG and WebP keep it, JPEG is flattened onto the background colour
How to resize a signature for a form
The settings sit above the drop zone because every one of them is knowable before there is a file: they come off the form you are filling in. The rectangle is the exception and lives in the panel, because a crop means nothing until there is a picture to measure it against.
- Type the size the form asks for. Width (px) and Height (px) sit above the drop zone, because both numbers come off the form rather than off the picture. Leave one side empty and it is worked out from the area you keep. The chips under them are examples only.
- Choose the scan on your device. Drop a signature scan or photo onto the panel, or press Browse files. JPEG, PNG and WebP, up to 20 MB, read where it already sits — there is no transfer step.
- Narrow the Area to keep down to the ink. The whole image is kept to begin with. Set X, Y, Width and Height under Area to keep and the outline over the preview follows you, dimming everything it is about to throw away. Select the whole image puts it back.
- Pick the format and the ceiling. Save as gives you JPG or PNG, and Background — White or Black — decides what fills the space behind the ink when JPG cannot be transparent. Type a number into Maximum file size (KB) if the form names one, or leave it empty for no limit.
- Press Make signature. If the crop is a different shape than the box you typed, the select of that name decides between fitting inside it, filling it and trimming the edges, or stretching to it. While a ceiling is being searched for the button reads Finding the size.
- Read the line under the result, then Download signature. It names the size and the byte count you finished on, the region that was kept, and whether the dimensions had to change to meet the limit. Press Download signature once those figures match what the form asked for.
Cut the paper away before anything else
A scan of a signature is mostly paper. The strokes might occupy a fifth of the frame, and every other pixel is margin that still has to be stored, still has to be scaled and still spends part of whatever file size limit the form set. Trimming to the ink is usually the single largest saving available on this page, and it costs nothing.
It also changes what the size means. The width and height you type are applied to the area you kept, not to the original scan, so margin left inside the selection becomes margin inside the finished box — ask for 300×80 around a generous crop and the signature itself arrives at half that, looking thin and faint in a field sized for it.
The whole image is kept when a file lands, so narrowing it is an edit rather than a required step. Set X, Y, Width and Height under Area to keep and the outline moves over the preview, dimming the part that goes; the line above the fields reads back what you have described as Keeping, with the corner it starts from. Select the whole image restores everything if you go too far. The cropper is the better page when the picture is not a signature and you only want a rectangle out of it — it has aspect-ratio chips and no size or byte fields to fill in.
Width, height, and what happens when the two shapes disagree
Type both numbers when the form gives both. Leave one side empty and it is worked out from the area you kept, which keeps the signature in its own proportions — a 200 px width asked of a 400×120 selection comes back 200×60.
A signature is wide and short, and the box a form names rarely shares that shape. That is genuinely ambiguous, so the select labelled If the crop is a different shape asks you rather than guessing:
- Fit inside the size (no distortion) is the default. The selection is scaled until all of it sits inside the box, so one side can come back smaller than the number you typed. Nothing is cut off and nothing is squashed.
- Fill the size and trim the edges gives you both numbers exactly, and pays for them by scaling until the box is covered and cutting the overflow off the middle. Safe when the crop is close to the right shape already, and expensive when it is not.
- Stretch to the exact size (distorts) resamples straight to the box, so handwriting comes out visibly squashed or drawn out. It exists for a field that checks the dimensions and nothing else, it is never the default, and the result says Stretched to the exact size you chose so nobody discovers it later.
Fitting is also allowed to enlarge, so a small crop is scaled up to reach the box and the strokes soften as it goes. If the result looks woolly, the answer is a bigger scan rather than a different setting. And the neatest way to land on both of the form’s numbers is to crop close to the shape it asked for in the first place. Resizing an ordinary photo is a different job with different controls — a percentage, one side, or a full pixel box.
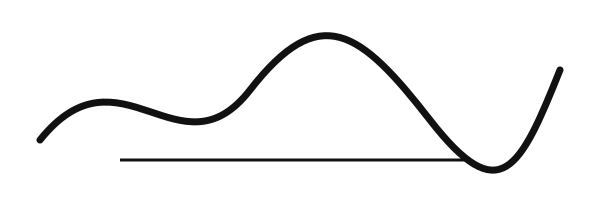
PNG keeps the paper as it is; JPG fills it in
Ink on paper is two tones doing nearly all the work, which is the picture PNG is best at: it stores runs of identical colour exactly, so a tightly cropped signature often lands in a couple of kilobytes with every stroke where it was drawn. JPG approximates instead, and approximation is worst against a hard edge — the grey halo around each stroke at low quality is the encoder guessing at an edge it cannot afford to store.
So PNG is the better default for this particular kind of picture, and the form still outranks it. Save as offers JPG and PNG because those are the two that signature fields accept; if yours names one, that is the one.
Background — White or Black — only applies to JPG, which has no transparency to keep, and the radios grey out the moment PNG is selected. White is the default because a signature is going onto a document. What neither setting does is remove anything: this page will not lift the ink off its background, so a photograph of white paper stays a rectangle of pale pixels whichever format you choose.
When the form also names a number of kilobytes
Maximum file size (KB) is the ceiling, and leaving it empty means no ceiling at all. The box is reached first and the ceiling is spent afterwards, which is the order that matters: the dimensions are what the form checks by eye, so they are the last thing given up.
For a JPG, quality comes down first and stops at 50, because below that the blocking and ringing become visible on a document. Only if 50 is still over the line does the picture start shrinking, at four fifths of each side per step, up to eight steps and never below 32 pixels on the short side. A PNG has no quality dial at all — the encoder here is lossless — so a PNG under a tight ceiling goes straight to losing pixels.
None of that is silent, and that is the point of the page. The line under the finished picture reads either Dimensions were not changed to meet the size limit, or a sentence naming the size it was shrunk from and the size it ended on. A form that asked for 300×80 will not take 240×64, and you cannot see the difference in a preview — being told is the only way to find out before the form does.
Ceilings from 10 KB up to 20 MB are accepted, and anything outside that says so under the field. While the search runs the button reads Finding the size, because it is encoding the picture repeatedly and measuring what actually came out rather than estimating. Compress it to 20 KB is the page to use when the crop and the pixels are already right and only the number is wrong.
What this page does not do, and what it needs from your device
JPEG, PNG and WebP, up to 20 MB per file; the finished signature can be at most 8000 pixels on a side, and a scan too large for what this device can hold in memory is refused before it starts, with the reason. An iPhone picture still in HEIC is not one of those and has to be converted before it can be cropped here — turn it into a JPEG first and then come back.
It crops, scales, fills the space behind a JPG and encodes. It does not remove a background, separate ink from paper, clean up a shadow or a crease, sharpen a blurred stroke, or redraw a signature as a vector. If a form wants a clean signature, the cheapest fix by a wide margin is a better scan: black pen, white paper, flat and evenly lit. Stripping the metadata is the separate job to reach for when the picture itself is already right and you only want the camera and scanner fields out of the file.
All of it happens on your own device. The scan is opened where it already sits, the rectangle is cut, the pixels are resampled and the new file is written on the same machine, so nothing is transmitted and no copy of your signature exists anywhere else. Because the output is built from raw pixels it carries no EXIF or GPS data either.
The one limit that belongs to you rather than to us is memory. A picture has to be unpacked into raw pixels before any of this can happen, which takes several times the file size, and a byte ceiling means encoding it several times over — so the panel costs the job before it starts and refuses it with a reason rather than letting the tab die holding your only scan.
Frequently asked questions
What size should my signature image be?
The size the form in front of you states, and nothing else. The chips on this page are labelled Small, Medium, Large and Extra large because they are examples of sizes forms tend to ask for — no size printed here is an official requirement, and a field that wanted 140×60 will refuse a 300×80 file that looked perfectly good. Read the field, type those two numbers into Width (px) and Height (px), and treat any kilobyte ceiling the same way.
Does my signature get uploaded anywhere?
No. The cropping, scaling and encoding software is loaded into the page, and your scan is read and rewritten by your own device, so it never reaches us and there is nothing for us to hold. The file you download is written from raw pixels, which means it carries no EXIF or GPS data from the scanner or the phone that made it.
Should I save a signature as JPG or PNG?
PNG first, unless the form says otherwise. Ink on paper is a small number of flat tones, which is the case PNG stores exactly and compactly, so every stroke keeps its edge. JPG approximates, and approximation shows worst against a hard edge — that is the grey haze that creeps around each stroke at low quality. Plenty of fields accept only one of the two, so what the form asks for outranks both.
Will this remove the paper from behind my signature?
No. This page crops, scales and encodes; it does not lift the ink off its background, erase a shadow or turn a scan into a transparent cut-out. Choosing PNG keeps whatever transparency the file already had, and a photograph of a page has none — the paper comes through as pale pixels. Choosing JPG fills the area behind the signature with the Background you picked, White or Black, because JPG cannot store transparency at all.
My signature came back smaller than the size I asked for. Why?
Because the maximum file size was reached by shrinking the picture. Quality is lowered first, down to 50, and only when that still misses the number do the width and height start stepping down. The line under the result always says which way it went — either “Dimensions were not changed to meet the size limit” or a sentence naming the size it was shrunk from and the size it landed on. If the form checks the pixels as well as the bytes, crop closer to the ink and run it again.
Can I use a photo of my signature taken on a phone?
Yes, as long as it is a JPEG, PNG or WebP — those three, up to 20 MB. A scan too large for what this device can hold in memory is refused before it starts, with the reason. An iPhone picture still in HEIC is not one of them and has to be converted first. A flat, evenly lit shot beats an angled one every time: shadow, creases and paper texture are detail the encoder has to pay for out of the same budget as the ink.
What to do next
- A photo rather than a signature to bring to a size? Use the resizer Resize Image
- The rest of the application has a byte limit too? Compress each file Compress Image
- The form wants a format this page does not write? Convert it Convert Format
- Only the framing is wrong? Crop it on its own Crop Image
- Sending a photo with the form? Take the camera data out of it first Remove Image Metadata
- The signature has to arrive inside a document? Put it in a PDF JPG to PDF
- Compress many JPG, PNG and WebP files to a maximum size each, then download them one by one or as a ZIP. Bulk Image Compressor
- Convert many JPEG, PNG, WebP and AVIF files to one format at once, then download them one by one or as a ZIP. Bulk Image Converter
- Make favicon.ico, the PNG icons and an Apple touch icon from one logo in your browser — nothing is uploaded. Favicon & App Icon Generator
- Convert iPhone HEIC photos to universal JPEG. Convert HEIC
- Crop and size a passport or ID photo to exact pixels, file size, format and DPI. Passport & ID Photo
- Fit an image to exact pixels and a maximum file size in one step — crop or pad, encode, write DPI and check the file before download. Image Size Fitter
- Lay out as many copies of a passport or ID photo as fit on 4 × 6, 5 × 7, Letter or A4 paper at exact physical size, as a JPEG or PDF to print at 100 %. Passport Photo Print Sheet
- Set the print resolution a JPEG or PNG claims, without re-encoding it. Change Image DPI
- See the EXIF, GPS, XMP and colour-profile data stored in a photo without uploading it — the file is read in your browser and never changed. Image Metadata Viewer
- Combine several PDFs into one file, in the order you choose. Merge PDF
You are on the Signature Resizer tool.